- Learn
-
Blogs
- podman
- collections
- cheat sheet
- Webpack
- WSL
- Tools
- Tips
- RxJava
- Retrofit
- RecyclerView
- React
- Project
- Programming
- Picasso
- Outline
- Operator
- Open Source
- Null safety
- Memory
- Fragment
- Flutter
- ES6
- Do it Kotlin Project
- Dagger
- Coroutine
- Composer
- Border
- Babel
- Amazon
- Android
- Angular
- Bootstrap
- Bootstrap 3
- DOM
- Drupal
- Drupal7
- Fuse
- Hoisting
- HTML
- ionic
- Java
- Javascript
- jQuery
- JSON
- Layout
- Linux
- Motion Detect
- Nodejs
- PHP
- Primitive types
- React Native
- ReactJS
- Setting
- Ubuntu
- Views
- Web
- WebView
- Wordpress
- Kotlin
- MusicScore
맥 혹은 윈도우 WSL에 iTerm2 터미널 환경 구성
Windows 10에 WSL 리눅스 환경 구성
PowerShell에서 윈도우 Feature 활성화
Administrator 권한으로 PowerShell을 실행한 후 다음과 같이 명령을 내립니다.
Enable-WindowsOptionalFeature -Online -FeatureName Microsoft-Windows-Subsystem-Linux
이 명령을 수행하면 윈도우를 재부팅할 수 있습니다.
마이크로소프트 스토어에서 앱 설치
다음 두 개의 앱을 설치합니다. 몇 가지 추가기능을 원하면 Windows Terminal의 경우 Preview를 선택합니다.
- Ubuntu 18.04 LTS 이상 (최근 22.04)
- Windows Terminal
터미널 설정
.bashrc를 열고 다음과 같이 커멘드라인의 텍스트를 설정할 수 있습니다.
code ~/.bashrc # vscode 혹은
vim ~/.bashrc # vim

프롬프트를 변경하려면 다음과 같이 PS1에 대한 환경변수를 변경할 수 있습니다.
export PS1="\w$ " # full working dir
export PS1="\W$ " # basename of working dir
export PS1="\u@\W $ " # username @ working dir
export PS1="[\t] \u@\h:\w\$ " # timestamp + username + host + working dir
VS Code의 WSL 확장 설치
윈도우의 리눅스 서브시스템에 접근 및 개발을 위해 다음과 같은 확장을 설치합니다.
- Remote - WSL
터미널에서 zsh 설치하기
만일 리눅스의 기본 툴이 없다면 설치해 둡니다.
sudo apt update
sudo apt-get install build-essential procps curl file
이제 리눅스 명령을 통해 필요한 패키지를 설치할 수 있습니다.
sudo apt install git zsh -y
Zsh를 설치하고 쉘을 변경할 수 있습니다. 설치시 기본 쉘을 zsh로 변경할 것인지 물어봅니다. Yes를 선택합니다. 만일 어떤 이유로 선택하지 못했다면 다음과 같이 수동 변경할 수 있습니다.
sudo chsh -s $(which zsh)
맥사용자는 iTerm2 설치하기
iTerm2 설치
- 터미널.app에 다음 명령어 입력합니다.
brew install --cask iterm2설치 확인
iTerm이라는 어플리케이션이 설치되었는지 확인합니다. 커맨드(⌘ Command) 키와 쉼표(,)키를 눌러서 환경설정을 열 수 있습니다. 이제 기호에 맞춰 설정해 줍니다.
상태바 나타내기
-
iTerm.app 실행
-
iTerm 2 > Preference 클릭
-
Appearance > General > Theme을
Minimal로 변경 -
Profiles > Session에서
Status bar enabled체크 후configure Status Bar클릭 -
Battery Level, CPU Utilization, Memory Utilization, Network Throughput 선택하여 Active 하기
-
Auto-Rainbow를 Automatic로 변경 후 OK 클릭


iTerm.app을 실행하여 Status bar가 활성화 된 것을 확인합니다.
테마의 변경
깔끔한 Minimal로 변경해 봅니다.

맥 혹은 윈도우에 Oh my zsh 설치하기
이제 윈도우나 맥 터미널에서 공식 사이트에 나온것 처럼 Oh-my-zsh를 다음과 같이 설치합니다.
sh -c "$(curl -fsSL https://raw.githubusercontent.com/ohmyzsh/ohmyzsh/master/tools/install.sh)"
설치가 완료되면 .zshrc 파일을 수정해 테마 등을 설정할 수 있습니다.
Note: Oh my zsh?
oh-my-zsh은 Zsh configuration을 관리하기 위한 툴로 다양한 플러그인과 테마가 있어 zsh을 조금 더 편하게 사용할 수 있습니다.
테마를 적용하는 경우 상황에 따라서 매우 느린 초기화 및 느린 커멘드라인을 볼 수도 있습니다. 여러가지 테마를 실험해 보고 빠르게 작동하는 테마를 선택합니다.
윈도우 터미널의 settings.json 설정
윈도우의 터미널의 경우 아이콘과 ligature를 지원하는 폰트를 사용하려면 먼저 여기서 MesloLGS NF와 같은 폰트를 다운로드해 윈도우에 설치해 둡니다. 윈도우 탐색기에서 더블클릭하면 손쉽게 폰트를 설치할 수 있습니다. 이제 다음과 같이 터미널의 설정 파일을 추가 수정 합니다.
{
    "initialCols" : 140,
    "initialRows" : 45,
    "theme" : "dark",
    "showTabsInTitlebar" : true,
    "showTerminalTitleInTitlebar" : true,
    "wordDelimiters" : " ./\\()\"'-:,.;<>~!@#$%^&*|+=[]{}~?\u2502"
    ...
    "profiles":
    {
        "defaults":
        {
            // Put settings here that you want to apply to all profiles.
        },
        "list":
        [
            {
                ...
            },
            {
                "guid": "{...}",
                "hidden": false,
                "name": "Ubuntu-18.04",
                "source": "Windows.Terminal.Wsl",
                "fontFace" : "MesloLGS NF",
                "fontSize" : 11,
                "historySize" : 9001,
                //"useAcrylic" : true,
                //"acrylicOpacity" : 0.9,
                "backgroundImage" : "d:\\Pictures\\background.jpg",
                "backgroundImageAlignment" : "left",
                "backgroundImageOpacity" : 0.07

            }
        ]
    },
...
폰트나 배경화면 등을 설정할 수 있습니다.
.zshrc의 설정
이제 터미널을 재시작하면 zsh쉘을 기본으로 사용할 수 있게 됩니다. 경우에 따라서는auto-complete의 인덱스 기능의 퍼미션 문제로 인해 몇 가지 이슈를 발생할 수 있습니다. 문제가 발생하는 경우 ~/.zshrc에서 다음과 같이 비활성화 합니다.
ZSH_DISABLE_COMPFIX=true
Powerlevel10K의 설치 (윈도우/맥)
- GitHub: Powerlevel10k > installation
인터렉티브한 설정을 통해 상세하게 테마를 조정할 수 있습니다. 좀 더 자세한 정보는 여기를 확인합니다. git으로부터 바로 설치합니다.
git clone --depth=1 https://github.com/romkatv/powerlevel10k.git $ZSH_CUSTOM/themes/powerlevel10k
이제 ~/.zshrc에서 테마를 다음과 같이 변경합니다.
ZSH_THEME="powerlevel10k/powerlevel10k"
이제 터미널을 재시작하면 자동으로 설정이 시작됩니다. 다음과 같은 명령으로도 언제든 설정을 변경할 수 있습니다.
p10k configure
이제 기호에 따라 선택하면 됩니다. 설정시 Instant Prompt 설정을 지정해 터미널 시작 시 느린현상을 조금 빠르게 합니다. 플러그인을 많이 활성화 할수록 터미널이 느려진다는 점을 명심하시기 바랍니다.
윈도우 터미널 색상 변경
윈도우의 경우 터미널 설정에서 scheme을 통해 색상을 변경할 수 있습니다. 맥에서는 iTerm2의 프로파일 설정에서 변경합니다.
    "schemes": [
        {
            "background" : "#002B36",
            "black" : "#002B36",
            "blue" : "#268BD2",
            "brightBlack" : "#657B83",
            "brightBlue" : "#839496",
            "brightCyan" : "#D33682",
            "brightGreen" : "#B58900",
            "brightPurple" : "#EEE8D5",
            "brightRed" : "#CB4B16",
            "brightWhite" : "#FDF6E3",
            "brightYellow" : "#586E75",
            "cyan" : "#2AA198",
            "foreground" : "#93A1A1",
            "green" : "#859900",
            "name" : "wsl",
            "purple" : "#6C71C4",
            "red" : "#DC322F",
            "white" : "#93A1A1",
            "yellow" : "#B58900"
        }
    ],
이제 wsl 설정을 다음과 같이 변경할 수 있습니다.
        {
            "guid": "{c6eaf9f4-32a7-5fdc-b5cf-066e8a4b1e40}",
            "hidden": false,
            "name": "Ubuntu-18.04",
            "source": "Windows.Terminal.Wsl",
            "colorScheme" : "wsl"
        }
추가 폰트가 필요한 경우 다음과 같이 설정할 수 있습니다.
mkdir c:/fonts
cd c:/fonts
git clone https://github.com/powerline/fonts.git
cd fonts
.\install.ps1
터미널 설정에서 추가합니다.
        {
            "guid": "{c6eaf9f4-32a7-5fdc-b5cf-066e8a4b1e40}",
            "hidden": false,
            "name": "Ubuntu-18.04",
            "source": "Windows.Terminal.Wsl",
            "colorScheme" : "wsl",
            "fontFace" : "DejaVu Sans Mono for Powerline"
        }
brew의 설치 (윈도우/맥)
Mac에서 사용하던 brew를 WSL에도 설치할 수 있습니다. 먼저 설치 스크립트를 이용해 다음과 같이 설치할 수 있습니다.
/bin/bash -c "$(curl -fsSL https://raw.githubusercontent.com/Homebrew/install/master/install.sh)"
다음 단계로 Homebrew를 PATH에 넣어주는 것입니다. 여기서는 zsh를 사용하므로 /home/계정/.zprofile에 다음 명령을 통해 추가합니다. 윈도우 혹은 맥에 따라 위치가 틀릴 수 있으므로 설치 후 최종적으로 나온 메시지를 사용합니다.
설정 명령 예
echo 'eval $(/home/linuxbrew/.linuxbrew/bin/brew shellenv)' >> /home/youngdeok/.zprofile
eval $(/home/linuxbrew/.linuxbrew/bin/brew shellenv)
만일 bash를 사용하는 경우에는 다음과 같습니다.
test -d /home/linuxbrew/.linuxbrew && eval $(/home/linuxbrew/.linuxbrew/bin/brew shellenv)
test -r ~/.bash_profile && echo "eval \$($(brew --prefix)/bin/brew shellenv)" >>~/.bash_profile
echo "eval \$($(brew --prefix)/bin/brew shellenv)" >>~/.profile
이제 잘 작동하는지 다음과 같은 명령을 수행해 봅시다.
brew install hello
Updating Homebrew...
==> Downloading https://linuxbrew.bintray.com/bottles/patchelf-0.10.x86_64_linux.bottle.1.tar.gz
...
######################################################################## 100.0%
==> Installing dependencies for hello: patchelf
==> Installing hello dependency: patchelf
==> Pouring patchelf-0.10.x86_64_linux.bottle.1.tar.gz
🍺  /home/linuxbrew/.linuxbrew/Cellar/patchelf/0.10: 8 files, 921.5KB
==> Installing hello
==> Pouring hello-2.10.x86_64_linux.bottle.tar.gz
🍺  /home/linuxbrew/.linuxbrew/Cellar/hello/2.10: 52 files, 595.6KB
nodejs의 설치
먼저 nvm을 설치합니다.
curl -o- https://raw.githubusercontent.com/nvm-sh/nvm/v0.39.7/install.sh | bash
이후 터미널을 닫고 다음과 같이 nvm명령을 확인합니다.
nvm --version
nvm install node
nvm ls
node --version
npm --version
yarn --version
유용한 플러그인 설치
syntax highlighter
커멘드라인 명령어에 대한 하이라이트 기능을 제공합니다. brew를 이용해 간단히 설치할 수 있습니다.
brew 설치
brew install zsh-syntax-highlighting커멘드 설치
혹은 다음과 같이 설치할 수도 있습니다.
cd ~/.oh-my-zsh/custom/plugins
git clone https://github.com/zsh-users/zsh-syntax-highlighting.git
echo "source ${(q-)PWD}/zsh-syntax-highlighting/zsh-syntax-highlighting.zsh" >> ${ZDOTDIR:-$HOME}/.zshrc
source ~/.zshrc
zsh-autosuggestions
커멘드라인의 자동완성 기능을 제공합니다.
brew설치
brew install zsh-autosuggestions커멘드설치
git clone https://github.com/zsh-users/zsh-autosuggestions ${ZSH_CUSTOM:-~/.oh-my-zsh/custom}/plugins/zsh-autosuggestions
이제 ~/.zshrc 에 플러그인을 추가합니다.
plugins=(
    # other plugins...
    zsh-autosuggestions
)
bat
cat 대신 사용할 수 있는 하이라이트를 제공하는 뷰어입니다.
brew install bat
fd (Github)
find의 대용으로 사용할 수 있는 심플하고 강력한 검색 명령입니다.
fd -e jpg # 확장자 jpg만 검색
fd -e kt math # kt확장자중 math검색
fd -e kt math-E util# util이 포함된 검색결과는 제외

# Convert all jpg files to png files:
fd -e jpg -x convert {} {.}.png

# Unpack all zip files (if no placeholder is given, the path is appended):
fd -e zip -x unzip

# Convert all flac files into opus files:
fd -e flac -x ffmpeg -i {} -c:a libopus {.}.opus

# Count the number of lines in Rust files (the command template can be terminated with ';'):
fd -x wc -l \; -e rs
설치는 다음과 같습니다.
brew install fd
강력한 검색 - Fuzzy Search (Github)
매우 다양한 검색기능을 보여주는 툴입니다. 사용법은 Github를 참조합니다. 다음과 같이 설치할 수 있습니다.
brew install fzf
동영상을 통해 사용법을 확인합니다.
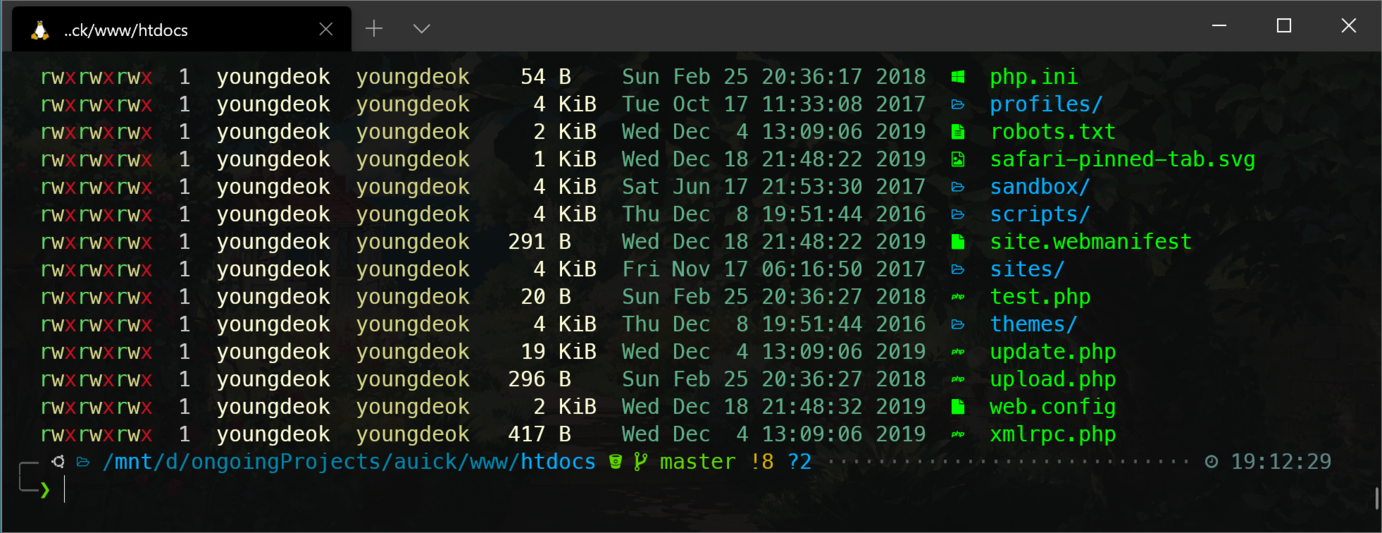
ColorLS - 컬러풀한 ls
아이콘과 함께 컬러풀한 파일 목록을 보여주는 ColorLS를 설치해 보겠습니다. 지금까지 진행한 스크린샷을 보겠습니다.

설치는 다음과 같은 절차로 진행합니다.
sudo apt-get install ruby-full
sudo gem install colorls
이제 ~/.zshrc에 다음과 같이 설정을 넣어줍니다.
...
alias cls=colorls
...
source $(dirname $(gem which colorls))/tab_complete.sh
이제 터미널을 다시 시작합니다. 화려한 툴인만큼 터미널 속도를 좀 느리게 합니다. 만일 파일 리스팅의 속도를 우선시 한다면 설치하지 않는것을 권장합니다.
Windows에서 WSL 디렉터리 접근
윈도우에서 리눅스 환경의 폴더에 접근하려면 다음과 같은 위치로 접근할 수 있습니다.
\\wsl$\<배포판명>
\\wsl$\Ubuntu-18.04
Troubleshooting
윈도우와 리눅스 환경 디렉터리가 섞이는 문제
regedit를 이용해 변경
node나 composer 를 이용하려는데 윈도우에 있는 도구 경로를 찾아서 시도하려고 하는 경우를 발견했습니다. 이것은 PATH 경로를 확인해보니 윈도우 디렉터리가 설정되어 있었습니다. bashrc나 zshrc에는 이런 경로가 설정되지 않은것으로 봐서 WSL터미널 프로그램 실행시 자체적으로 경로를 설정하는 것으로 예상됩니다.
╰─❯ echo $PATH
/home/youngdeok/.nvm/versions/node/v14.7.0/bin:/home/linuxbrew/.linuxbrew/bin:/home/linuxbrew/.linuxbrew/sbin:/usr/local/sbin:/usr/local/bin:/usr/sbin:/usr/bin:/sbin:/bin:/usr/games:/usr/local/games:/mnt/c/DevKits/Python38-32/Scripts/:/mnt/c/DevKits/Python38-32/:/mnt/c/Program Files (x86)/Intel/iCLS Client/:/mnt/c/Program Files/Intel/iCLS Client/:/mnt/c/Program Files (x86)/Common Files/Intel/Shared Libraries/redist/intel64/compiler:/mnt/c/Windows/system32:/mnt/c/Windows:/mnt/c/Windows/System32/Wbem:/mnt/c/Windows/System32/WindowsPowerShell/v1.0/:/mnt/c/Windows/System32/OpenSSH/:/mnt/c/Program Files (x86)/NVIDIA Corporation/PhysX/Common:/mnt/c/Program Files/NVIDIA Corporation/NVIDIA NvDLISR:/mnt/c/Program Files/Pandoc/:/mnt/c/Program Files (x86)...
regedit를 사용해 다음 경로에서 Flags를 7에서 5로 바꿉니다.
HKEY_CURRENT_USER\Software\Microsoft\Windows\CurrentVersion\Lxss\{GUID}\Flags터미널을 재시작하면 이제 윈도우 관련 PATH는 제거되어 나올것입니다.
╰─❯ echo $PATH
/home/youngdeok/.nvm/versions/node/v14.7.0/bin:/home/linuxbrew/.linuxbrew/bin:/home/linuxbrew/.linuxbrew/sbin:/usr/local/sbin:/usr/local/bin:/usr/sbin:/usr/bin:/sbin:/bin:/usr/games:/usr/local/games:/home/youngdeok/.fzf/bin
환경 설정을 통한 변경
레지스트리를 건드리는 것이 좀 위험해 보인다면 다음과 같이 WSL에 대한 설정 파일을 만들고 윈도우 폴더 추가를 비활성화 할 수 있습니다. WSL 내에서 다음과 같은 파일을 만듭니다.
> sudo vi /etc/wsl.conf

[interop]
appendWindowsPath = false
그 다음 윈도우에서 배포판 이름을 terminate옵션을 통해 재설정 하면 wsl.conf가 반영되게 됩니다.
wsl.exe --list
wsl.exe --terminate <distro_name>
참고

Updated: 02 Feb 2024
Mobile Developer at Comparethemarket | Multiplatform | Full Stack | Kotlin, Flutter, Java, C/C++, Go, PHP
Language
Get in touch with us
"If you would thoroughly know anything, teach it to other."
- Tryon Edwards -